Today’s post is by guest blogger Nicole Kohler.
Did you know that Google gives out $10,000 in no-strings-attached advertising credit each month to nonprofit organizations – including churches? Did you also know that you can use this credit to bring new members into your church? It’s true: Google’s Ad Grants program, administered through Google AdWords, gives nonprofit organizations (including churches) up to $329 per day to place ads on the top and side of search results, driving clicks to their website…for free.
If you’re not familiar with Google AdWords, or you’d like to find out how to take advantage of the Google Ad Grants program, this tutorial should help. Read on to learn how you can grow your membership through the power of free advertising!
Who Can Use Google Ad Grants?
Free advertising might sound too good to be true – but for churches, charities, and other nonprofit organizations, it’s not. As long as your organization has a current 501(c)(3) status and has a functional website, you should be eligible.
Here are a few other things you should know about using Google Ad Grants:
- Government agencies, academic institutions, childcare centers, and medical organizations can’t use the program – so promoting your church-sponsored daycare is off the table
- However, according to Google, you can use the program for philanthropic education programs, including church-sponsored preschool or other learning programs
- You must have current 501(c)(3) status as assigned by the IRS and a valid EIN; copies of letters from the IRS are not sufficient proof of status (pending or otherwise)
- Websites that use AdSense ads or affiliate advertising, or those that request donations outside of the traditional philanthropic scope (e.g. asking for property donations), are not eligible
- To remain eligible, you must actively manage your account, which Google defines as “logging in monthly and making at least one change to your account every 90 days”
You’ll also need a current Google AdWords account to take advantage of the program. AdWords, which is Google’s advertising program, is where you’ll create and modify ads, increase and decrease your ad spend, and do all other activities related to your advertising campaigns.
If you’re already running a pay-per-click (PPC) program, you’re probably fairly familiar with AdWords. But if not, this next tutorial should help you learn the ropes.
Signing Up for Google AdWords
To sign up for AdWords, you’ll first need a Google account – like one you already use for Gmail, YouTube, Google+, or any other Google service. This account will be used to manage your advertising, so choose it carefully!
Once you have your account chosen, go to http://adwords.google.com and sign in. You will be asked to sign up on a very simple screen like this one:
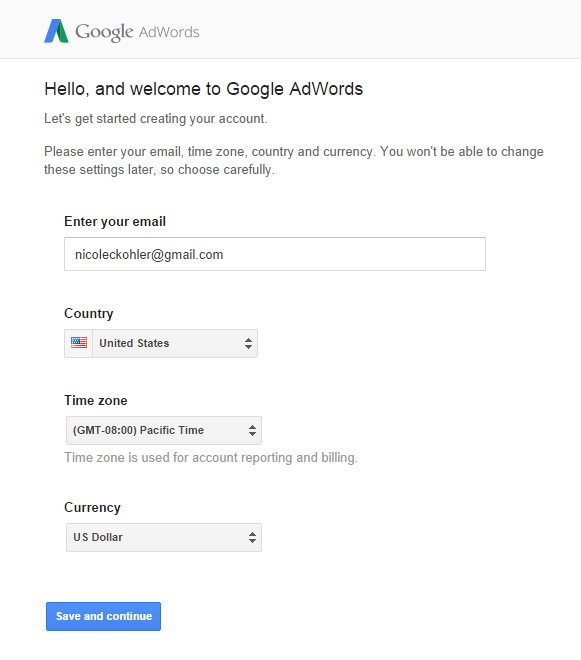
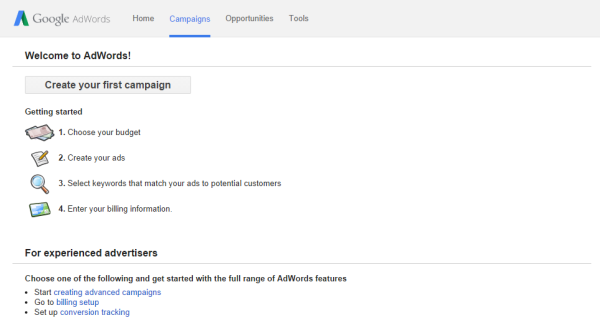
Choose your email address, country, time zone, and currency before clicking “Save and continue.” Once you have done this, you’ll be welcomed to an empty dashboard:
Creating Campaigns and Ad Groups
At this point, if you are planning to use AdWords only for your grant-sponsored advertising, you don’t have to do anything else. However, I would suggest playing around with a test campaign to understand how the program works, just so you know what to do when the time comes!
Click “Create your first campaign” and you’ll be sent to a new screen to set up your first advertising campaign. This will look extremely overwhelming and confusing the first time, but don’t worry: Google has great help resources, and you typically don’t need to change most of the options you see on these setup screens, either.
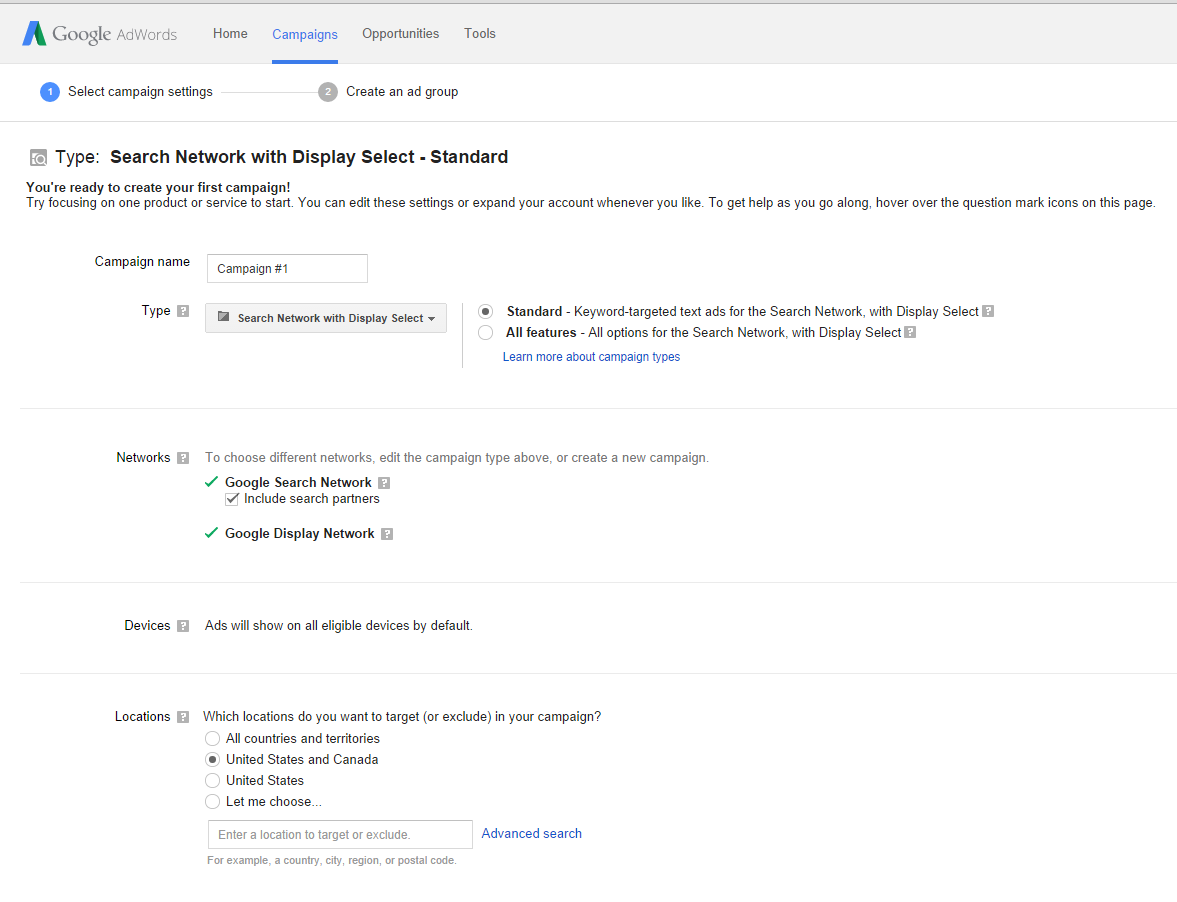
On this page, you’ll be prompted to create a campaign. A campaign consists of one or more ads that share one budget, and typically target one broad product or service. As a church, you will probably only ever have one or two campaigns, but ecommerce stores or manufacturers might have multiple – for example, a campaign for each group of products, or for each service they offer.
For your test campaign, you can focus on setting two parameters: location and budget. To start, scroll down until you see “Locations” and click the radio button that says “Let me choose…” This will allow you to start typing in the name of a city or area:
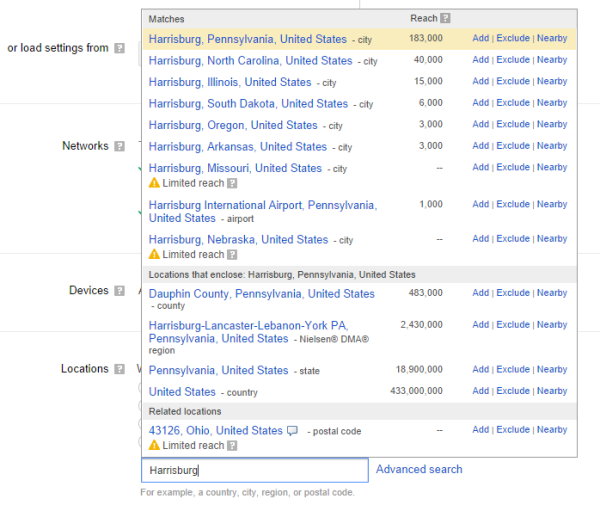
You can do some really great things with location targeting, as you can see in the screenshot above. However, it’s best not to be too broad, because you run the risk of wasting your ad dollars on views by those who aren’t even near your church. So pick a local city or two before moving on.
Continue scrolling down the page until you reach the bottom, where you’ll see a small box to define your budget:

Since the Grants program provides you with about $329 per day to use on your free advertising, let’s enter $329 in that box.
Below this, you’ll see a few other cool options, which allow you to add location information, links, or phone numbers to your ads. Whether you do these or not is entirely up to you. However, if you want to encourage people to call and/or visit your church, it’s not a bad idea to check the first and third options. The second option is mostly beneficial if you want to send those who see your ads to a “why join us” or other form of targeted landing page.
If you click any of these options, you’ll be prompted to fill in your location, phone number, or sitelink information. Click the “+ New” button at the bottom of each gray menu that appears to add new items, and a popup window will open to ask you for the details required.
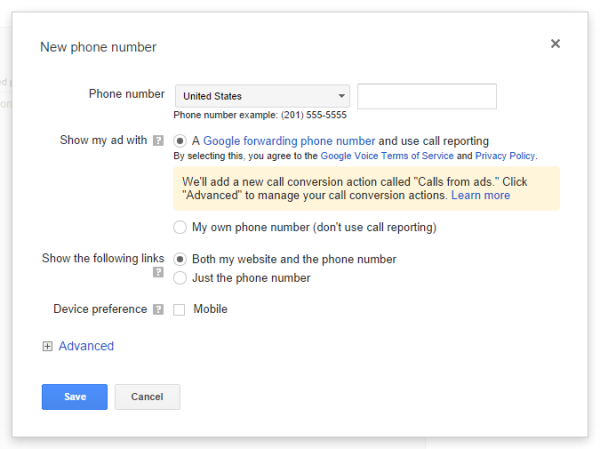
Once this is done, click “Save and Continue” and you’ll move on to your first Ad Group:
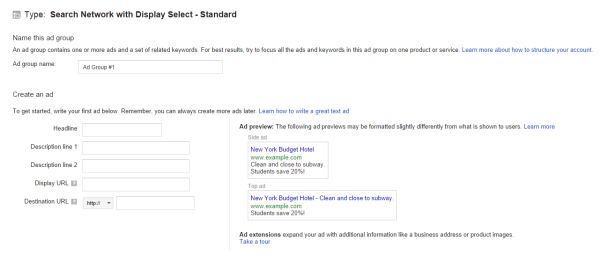
This is where you’ll write a test ad. Google has some great examples of ads you can model yours off of, but don’t be afraid to get creative! Think about ways that you can capture the interest of potential churchgoers as they are scrolling through search results.
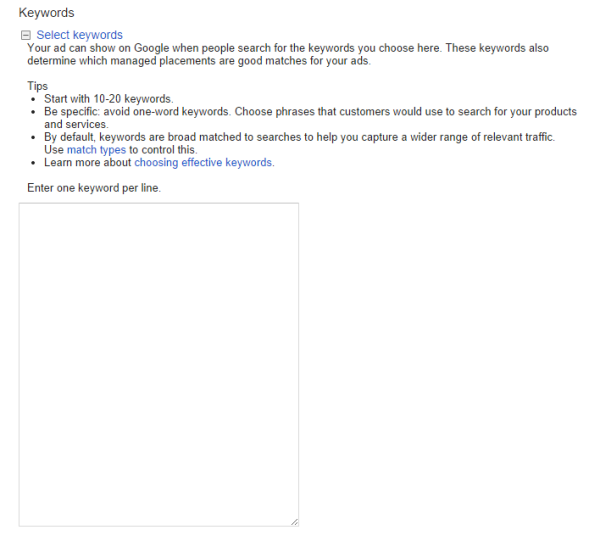
Finally, below this you’ll see an empty box asking you to enter keywords for your ad group. This is where you can enter the words and phrases that will help determine where your ad appears. These keywords should be pretty straightforward – for example, if you’re a church in Harrisburg, PA, you might target phrases like “church in Harrisburg,” “UCC Harrisburg PA,” “Harrisburg church,” and so on.
At the bottom of this page, you’ll see an option to proceed with your campaign and ad group and set up billing, or “set up billing later.” Click the latter and you’ll be able to view your AdWords dashboard, and explore the campaign manager and Ad Group tools, without having to pay anything. (Don’t worry – your ads won’t be active, and you won’t be charged anything.)
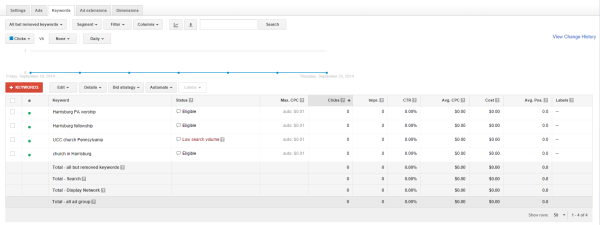
Spend some time exploring AdWords and getting to know the options you have available. This dashboard will be more interesting once you have actual data to look at, but it’s still a good idea to invest an hour or two in trying out different settings, adding and removing keywords, and reading up on basic PPC strategies, before you launch right into the Google Ad Grants program.
Applying for Google Ad Grants
Once your AdWords account is created, you will also need to create a Google for Nonprofits account. You can do that from this page.
After both accounts have been created, head over to this Google Support page to follow the step-by-step instructions to apply for Ad Grants.
After your application has been submitted, Google will review your eligibility and supporting documents, then contact you with their decision. If all goes well and your documentation is in order, you’ll be approved!
Once your application is approved, you’ll receive $10,000 in AdWords credit deposited into your account monthly. As mentioned, your spending limit on this credit is $329 per day (but you can spend less, or can spend all of it plus some of your own money if you want to place additional ads).
How Can We Use Ad Grants to Increase Our Membership?
So you’ve been awarded your free credit… now what do you do with it?
There are a variety of ways that you can grow your fellowship and increase interest in your church with these free ads. Here are a few ideas:
Location targeting: Perhaps the most obvious strategy, you can reach anyone who may be new to your area or searching for a new church with location-targeted ads. Target phrases like “church in (city)” or “(city) worship” to find these individuals.
Event promotion: Have a special event coming up? Whether it’s Vacation Bible School, a rummage sale, or just your annual Christmas service, you can use limited-time ads to promote it. Don’t be afraid to get broader with these keywords, or leave out the religious aspect: you’re more likely to reach people searching for “(city) rummage sale” or “Christmas services” than you are “(city) church yard sale” or “church choir.”
Donation drives: This may seem backwards, but you can absolutely run ads asking for donations. People who are searching for charities to donate their time, energy, and money to will see and appreciate your ads, provided they are for a good cause. Use your space to promote something like a church-sponsored soup kitchen or fundraiser vs your weekly collection, and you’re likely to see a higher response.
Volunteer recruitment: Need a few extra hands for an event you have coming up? Set aside some of your credit to run an ad or two asking for volunteers. If they’re looking for a place to worship, they might just stick around.
Content marketing: If you are using content marketing to reach potential worshippers, you can promote this content with your ads. Just make sure your destination URL points to the content itself, as opposed to your homepage or an un-targeted landing page – otherwise you’ll be wasting your clicks.
You can get a few more ideas on using your Ad Grants budget right here.
A Few Final Things to Keep In Mind
As already mentioned, once your ads are set up, you will need to log in once per month and make at least one change every 90 days to keep your account active. If this is not done, your grants will expire.
It’s not a good idea to “set it and forget it” when it comes to AdWords anyway, though. There’s certainly the temptation to look at Ad Grants as “free money,” but that doesn’t mean it should be wasted on ads that don’t convert or drive any interest. If an ad isn’t working – or an ad is working extremely well – you should adjust your campaigns accordingly.
Additionally, after your ads have been running for a while, you’ll find that there’s a wealth of information on your hands. You’ll be able to see which ads received the most clicks and when. Additionally, if you connect your AdWords account to Google Analytics, you’ll be able to dig deeper, learning the age and gender of those clickers, which ad landing pages have the highest engagement, and so on. This can present you with some very real, actionable information about those interested in your fellowship that can be used to your advantage in other marketing activities.
For example, let’s say you’re finding that a high number of 20-something females are clicking your location-based ads, reading your content, but leaving your site after a few minutes. If you know that females around this age respond well to email marketing, you could add a “subscribe to our email” pop-up on your content to capture their information and possibly bring them to your church, as opposed to losing their interest after a few minutes of reading.
Good Luck!
I hope this tutorial has helped you learn about AdWords and the Google Ad Grants program. If you decide to take advantage of Google’s generous advertising credits for nonprofits, I wish you the best of luck! AdWords may seem overwhelming at first, but with a little time and experience, it can be an enormous benefit to organizations of every size and shape, fellowships included.
ABOUT THE AUTHOR:
Nicole Kohler is a Web Content Strategist for WebpageFX, where she spends her time writing blog posts, how-tos, and emails that help people better understand online marketing. In her free time, Nicole enjoys hanging out with her husband and pets, playing video games, and reading classic literature. Follow her on Twitter @nicoleckohler.

